Learn to BEHAVE in no time
The goal of this guide is to get you to use BEHAVE in under 10 minutes.

BEHAVE can generally be used in three different ways:
- Stand-alone, without any detection file
- With a detection-file obtained from BEHAVE infer
- With a detection-file obtained through some other means
In this quick-start guide, we will guide you through the first two methods.
You will need two things to get started:
- A recent version (v121 or higher) of Google Chrome (on Windows / Linux / Mac). BEHAVE will run on desktops and laptops; on most other devices (mobile phones, tablets, ChromeBooks) BEHAVE will not work (although if you try and you find it to work, let us know :)).
- A video file to start behaviour coding on (in either MP4 or MTS format; you can find an explanation about the formats we support in our formats faq). If you don't have a video file at hand right now, we invite you to download a short 10-second, 20MB large, example MTS file, or a full 30 minute, 4GB large, MTS file. These are time-lapsed videos of a nest of Little Auks on Svalbard.
Step 1: Stand-alone BEHAVE UI
If your video file is in MP4 format, you are ready to start BEHAVE UI; if the video file is in MTS format, you will need to convert it to MP4. In order to do so, go to the convert tool, drag in the MTS video file, and it will be converted to an MP4 file.
Now that you have an MP4 file, open the BEHAVE UI, drag in the MP4 file and you can start behaviour coding.
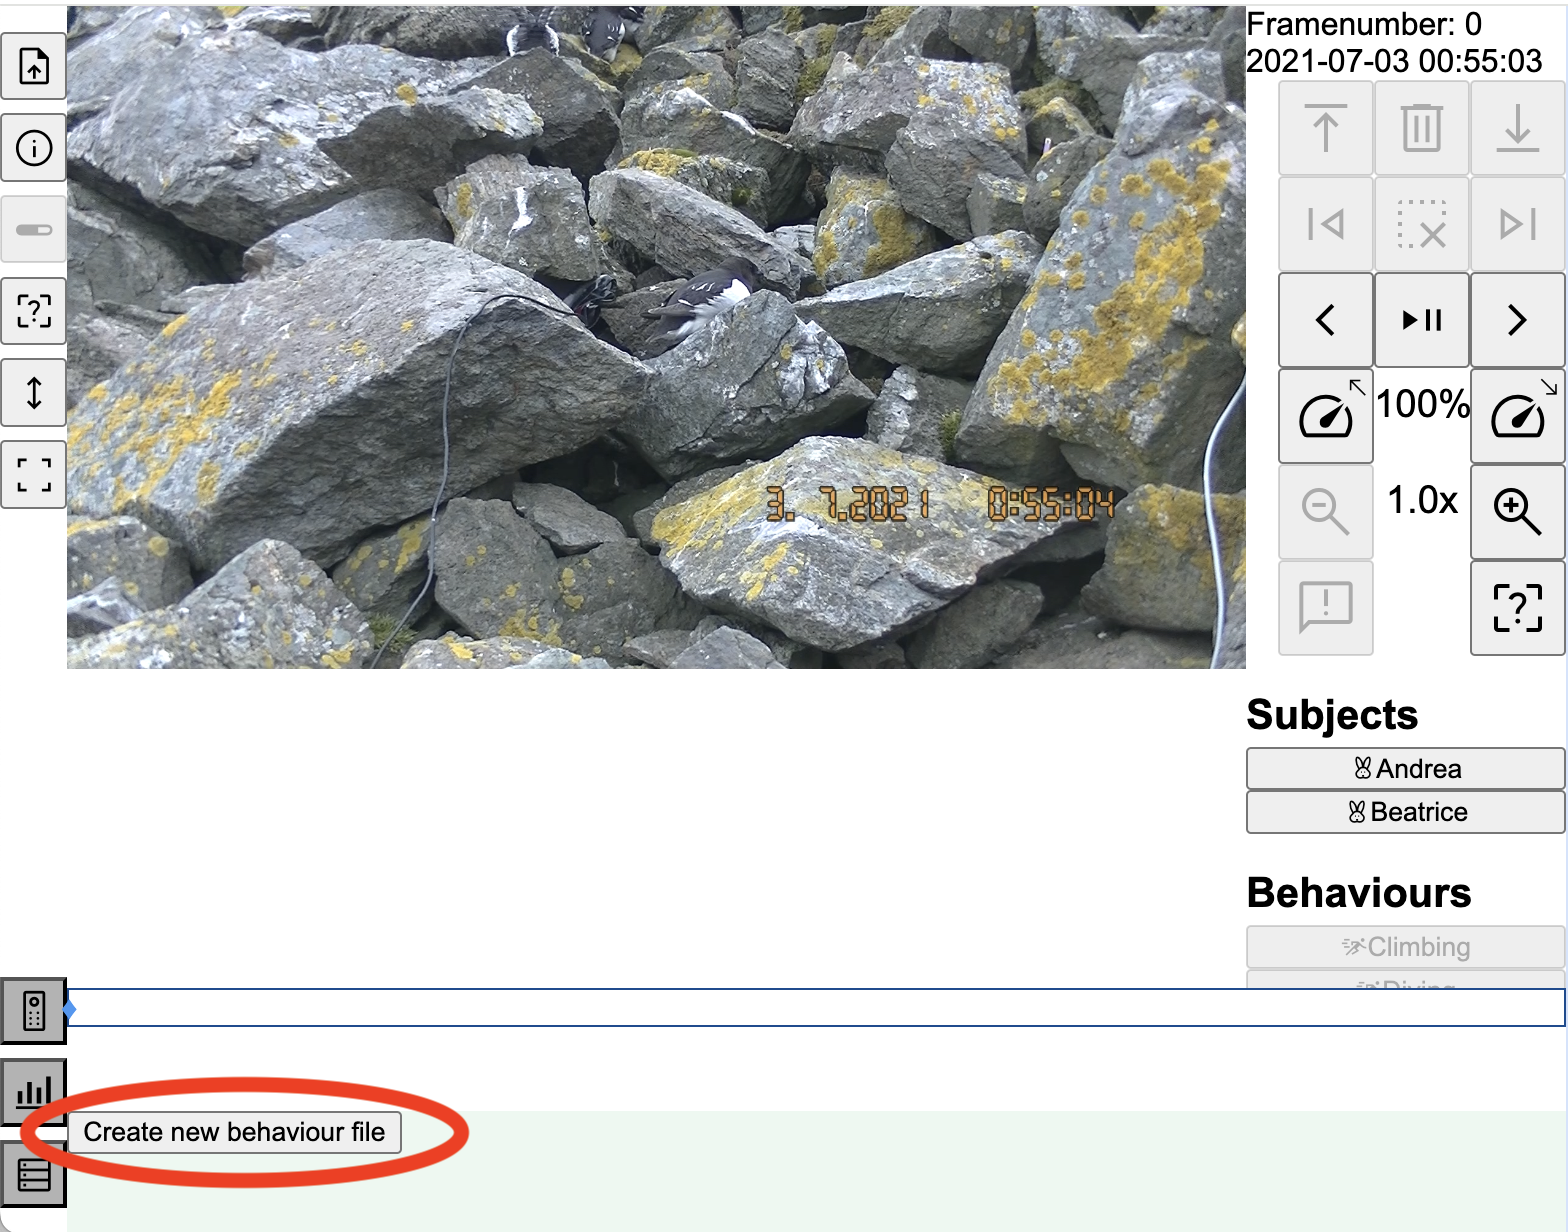
First create a new behaviour (csv) file by clicking "Create new behaviour file" at the bottom and selecting a spot to save this file.
Now you can start behaviour coding. You can pause/unpause the video using the s key, go to the next or previous frame with a and d (on a US QUERTY keyboard these are the leftmost keys on the middle row; if you have another keyboard layout it may make sense to reassign these keys), or using the mouse to click the buttons on the right.
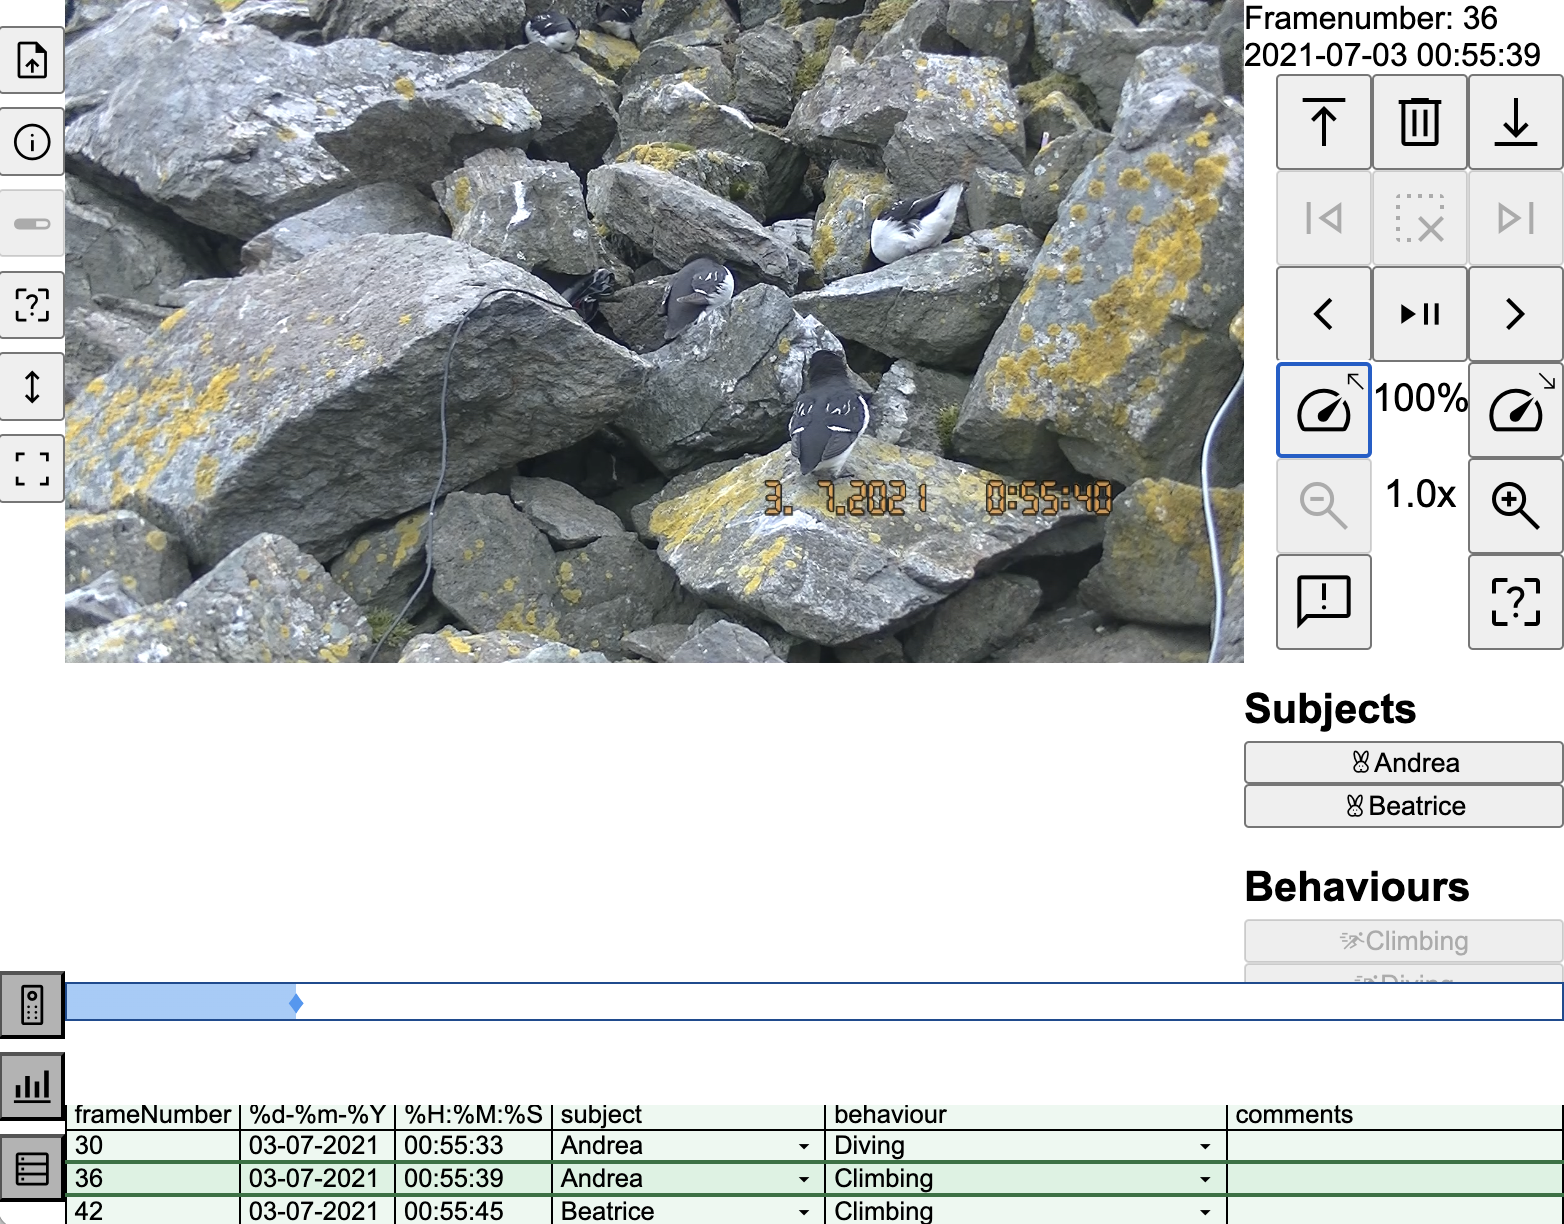
The default ethogram contains 2 subjects: Andrea (shiftA) and Beatrice (shiftB); and two actions: Climbing (shiftC) and Diving (shiftD).
In order to record behaviour on a certain frame, type shiftA (or click Andrea on the right of the screen) and then shiftD (or click Diving on the right of the screen; you may need to scroll downwards).
Congratulations, you have now recorded your first line of behaviour; at the bottom of the page you should see that the framenumber and timestamp have been copied from the video, and the subject and behaviour have been recorded.
This information has directly been written to disk; if you now open the .csv file in R or Excel you will see the recorded data.
Feel free to move forward/backward in the video, record some more behaviour lines.
You can click on a behaviour line to jump directly to that point in the video, double-click to edit the line, and press the garbage can (top right) to delete a line.
Of course the behaviours that we recorded now do not reflect actual actions on the video, but it should give you some general idea how to get started.
If you want you can change the ethogram (and all shortcuts used in BEHAVE UI) by pressing ? (or pressing the ? icon on the left or the right).
The behaviour file gets saved every time we make a change; when you're ready you can just quit the browser, leave the page or open a new video file, no need to first save your work.
Step 2: BEHAVE UI with detections through
Now that you have the managed to run BEHAVE UI stand-alone, it's time to unleash the super-power: AI detections.
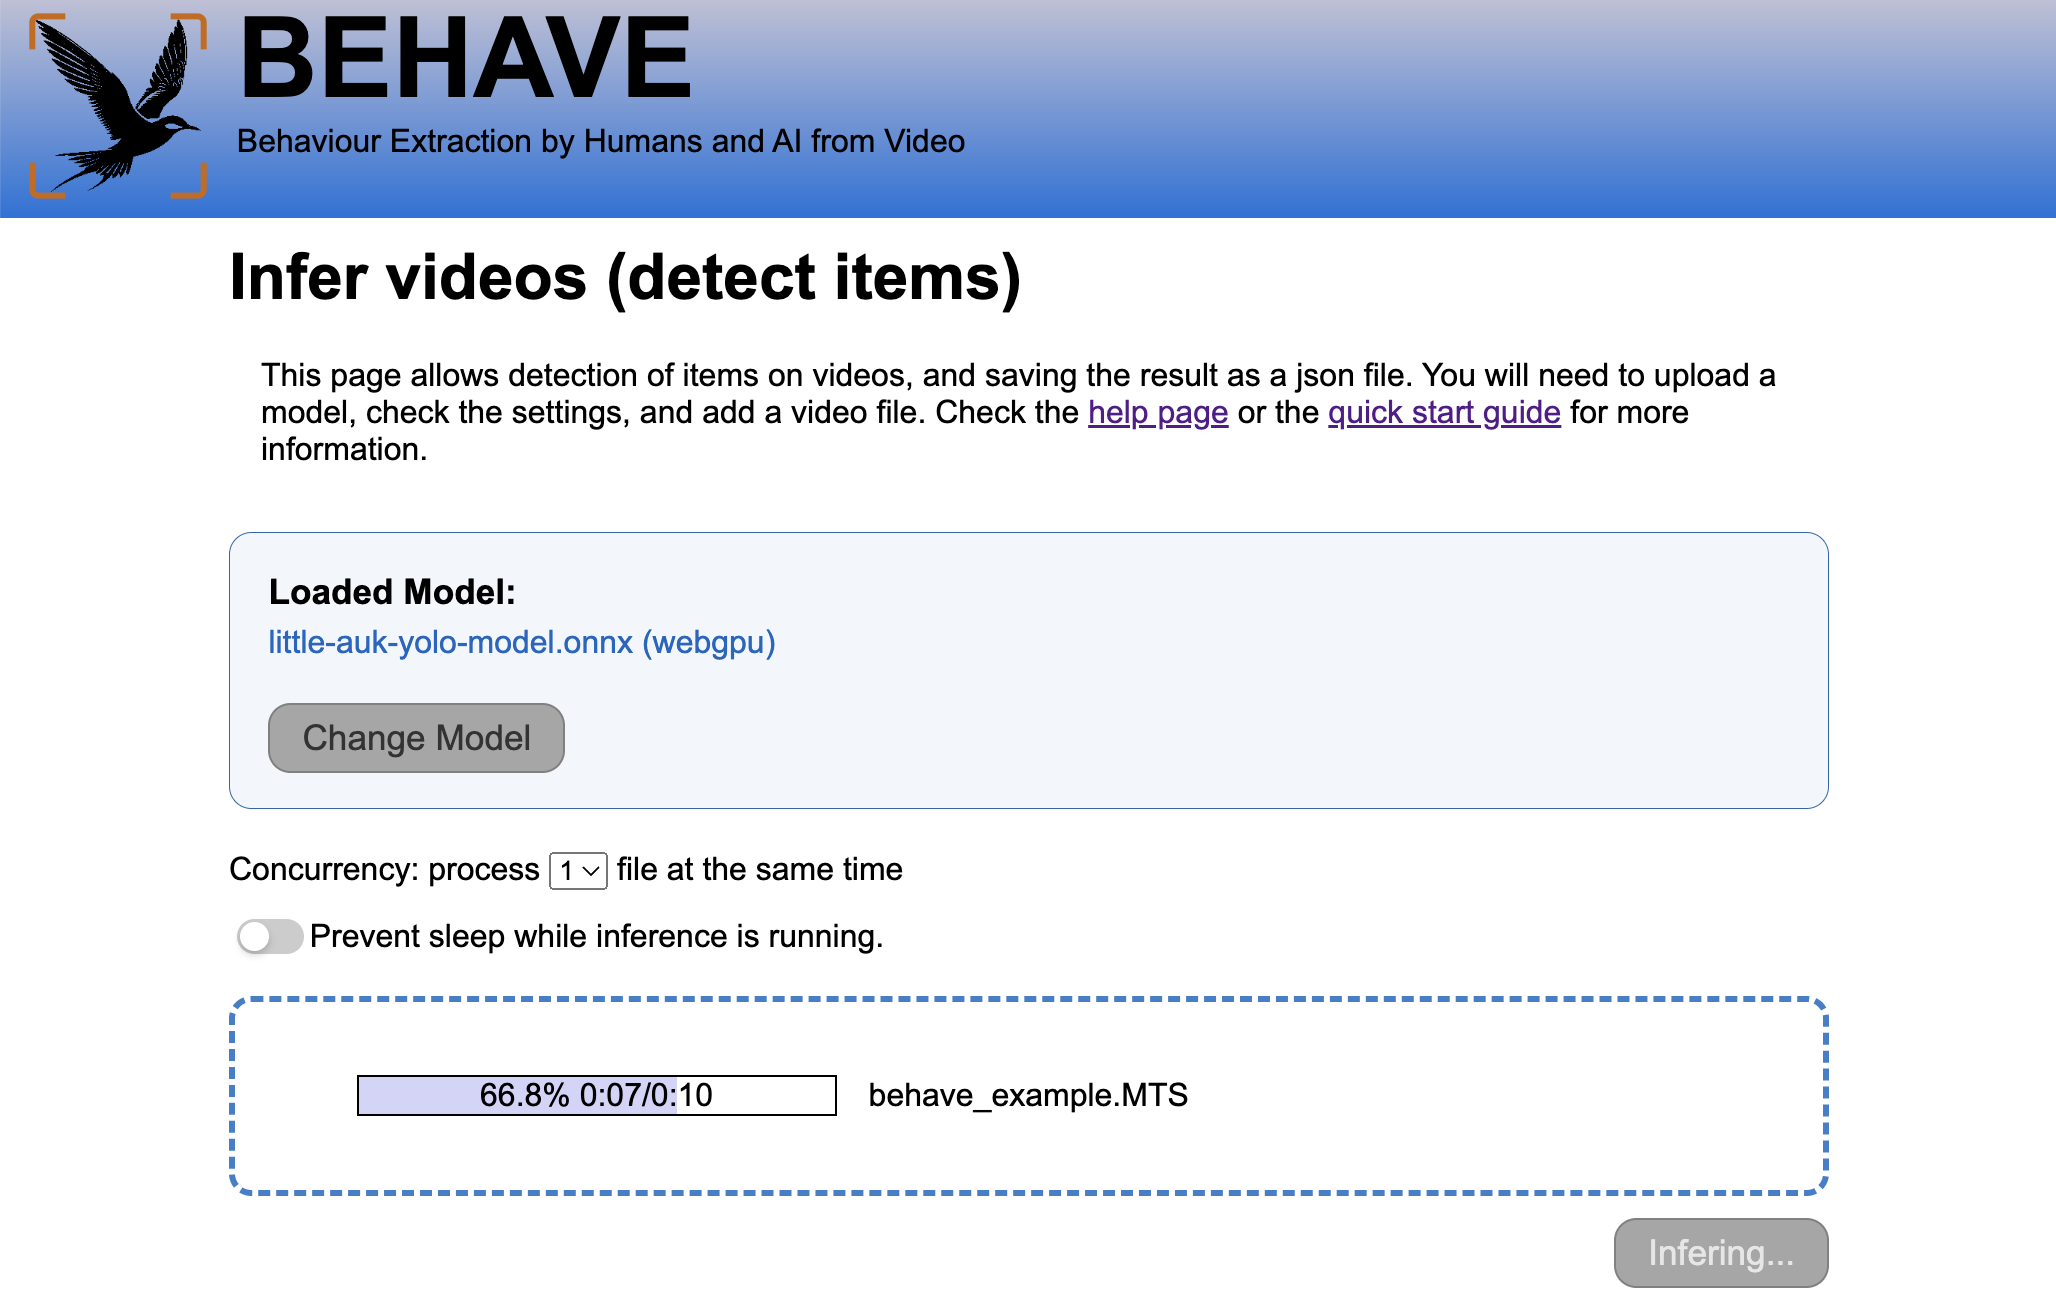
Before we can infer (the process of doing AI detections on the video), we need to choose a model to use. The model defines what is being detected (a model for cars will not detect people; a model for cats will not detect dogs, etc); it's therefore essential to choose the right model. In the model FAQ, we discuss in length what models one needs for what purpose, and how to obtain models that may work on your videos. For the purpose of this quickstart guide, I would advice to choose one of two models:
- If you used our example video and want the best results, use the custom trained Little Auk model. Note that this model was custom trained on Little Auks on the rocks of Svalbard, and probably will perform extremely badly if used for anything else.
- If you have a general video with wildlife (or want to try a general model on the Little Auk videos), use one of the Pytorch WildLife's MegaDetector v6 models: the small model or the (large model)[https://www.dropbox.com/scl/fi/u26qtmr7e4txeyafvfbie/MDV6b-yolov9c.onnx?rlkey=17sl4h1fb9tm58zzv31oiv5yn&dl=1]{download}. The large model will detect slightly more animals, however is about 10 times slower than the small model.
- (There is also a (general YOLOv10 nano model)[https://www.dropbox.com/scl/fi/puy2vhszdx4t47svfx162/yolov10n.onnx?rlkey=aw4oyurx9s2j0s1gxta6oe6ro&dl=1]{download}. This model works well on everyday items (cars, people, bikes, certain animals), but much less so on wildlife videos. It's included here in case your test video is one with everyday objects.)
After downloading the model, go to BEHAVE infer, select the model you just downloaded, and then drag in the video file (if you have an MTS file, make sure to drag in the original MTS file, not the converted MP4 file). Choose "Start inference", select the directory where to save the detection file and the system will run the model on each frame of the video in order to find a match. This may take some time, based on the video and model you choose, and your computer. In the infer FAQ we discuss inference speed in more detail.
After infer has completed, you have a file in the directory you selected, that has the detections in there (the filename ends in .behave.det.json).
Now open again BEHAVE UI, and drag in the MP4 video file, the .behave.det.json file (and if you want you can also add the behaviour file that you created in step one (it ends in .behave.csv).
You will see a view very similar to what we has in step 2, but now there is an extra bar with detections (the top half shows a zoomed-in version of the whole detection bar).
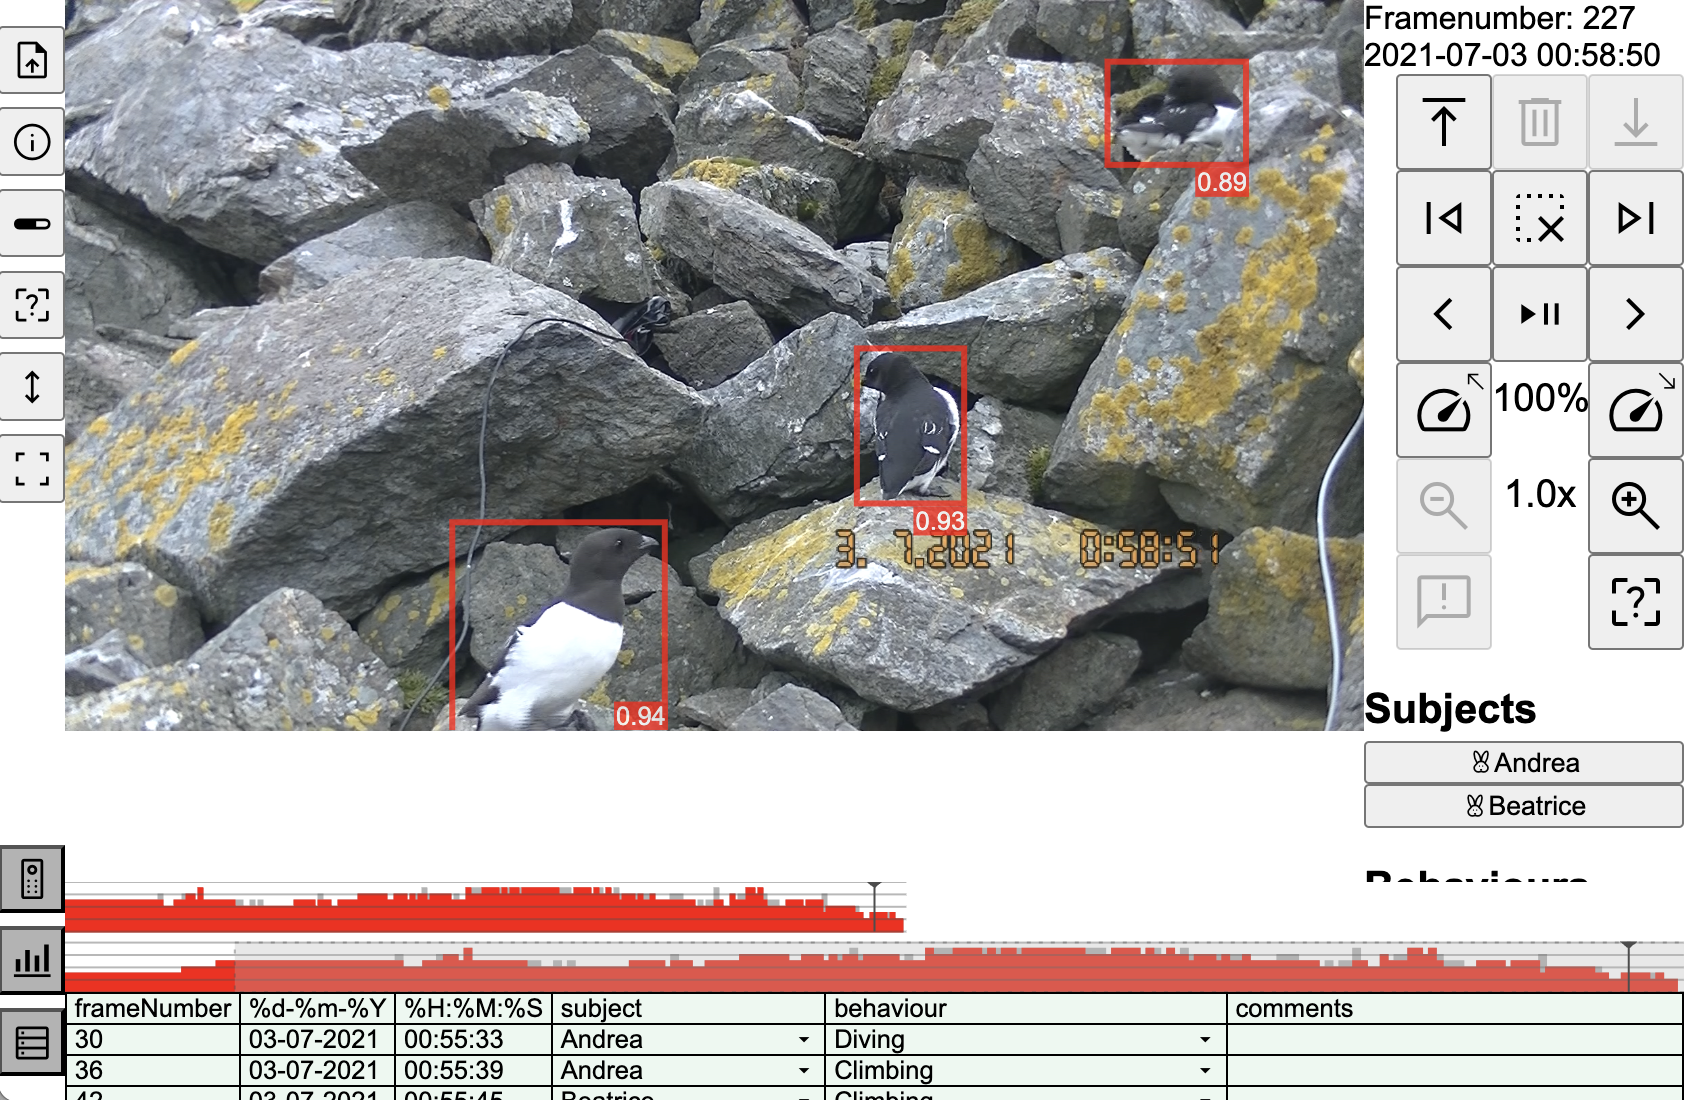
Note that with the 10 second example video used for this screenshot, there is not much benefit of the detections (since every frame has birds on it, so nothing could be skipped while behaviour coding). On the longer, 30 minute, video there are longer sections without detections. In addition to a and d to more to the previous and next frame, one can also now use q and e to go to the previous and next frame with a detection.
This concludes the quick-start; if you have any questions or remarks (positive or negative), don't hesitate to contact us on behave-app@claude.nl.